How-to Use Tensorflow/Keras on Talapas
TensorFlow is a common machine learning package primarily run in python: https://www.tensorflow.org/
Keras (https://keras.io/) is a high-level neural networks API, written in Python and capable of running on top of TensorFlow, CNTK, or Theano.
Pro Tip: Keras is also available in any standard TensorFlow install
import tensorflow.contrib.keras as keras
# or
import tensorflow as tf
tf.keras
Several versions of TensorFlow exist on Talapas this article will cover the GPU version of TensorFlow available on all GPU nodes.
Step-by-step guide
We will start by launching and iterative GPU session from one of the talapas login nodes
$ srun --account=<your account> --pty --gres=gpu:1 --mem=4G --time=60 --partition=testgpu bash
- Wait for your interactive session to start
Load the modules for tensorflow
$ module load cuda/9.0
$ module load python3
Check what GPU resources are available
$ nvidia-smi
+-----------------------------------------------------------------------------+
| NVIDIA-SMI 390.46                 Driver Version: 390.46                    |
|-------------------------------+----------------------+----------------------+
| GPU  Name        Persistence-M| Bus-Id        Disp.A | Volatile Uncorr. ECC |
| Fan  Temp  Perf  Pwr:Usage/Cap|         Memory-Usage | GPU-Util  Compute M. |
|===============================+======================+======================|
|   0  Tesla K80           Off  | 00000000:04:00.0 Off |                  Off |
| N/A   35C    P0    60W / 149W |     97MiB / 12206MiB |      0%      Default |
+-------------------------------+----------------------+----------------------+
Shows that we have successfully reserved 1 Tesla K80
Launch python 3 (Note: the python command will give you the default python2 version on the system, use python3)
$ python3
>>from tensorflow.python.client import device_lib
>>print(device_lib.list_local_devices())

2018-09-19 11:11:34.399858: I tensorflow/core/platform/cpu_feature_guard.cc:140] Your CPU supports instructions that this TensorFlow binary was not compiled to use: AVX2 FMA
2018-09-19 11:11:34.524069: I tensorflow/core/common_runtime/gpu/gpu_device.cc:1344] Found device 0 with properties:
name: Tesla K80 major: 3 minor: 7 memoryClockRate(GHz): 0.8235
pciBusID: 0000:04:00.0
totalMemory: 11.92GiB freeMemory: 11.75GiB
2018-09-19 11:11:34.524110: I tensorflow/core/common_runtime/gpu/gpu_device.cc:1423] Adding visible gpu devices: 0
2018-09-19 11:11:34.796876: I tensorflow/core/common_runtime/gpu/gpu_device.cc:911] Device interconnect StreamExecutor with strength 1 edge matrix:
2018-09-19 11:11:34.796918: I tensorflow/core/common_runtime/gpu/gpu_device.cc:917]      0
2018-09-19 11:11:34.796926: I tensorflow/core/common_runtime/gpu/gpu_device.cc:930] 0:   N
2018-09-19 11:11:34.797220: I tensorflow/core/common_runtime/gpu/gpu_device.cc:1041] Created TensorFlow device (/device:GPU:0 with 11399 MB memory) -> physical GPU (device: 0, name: Tesla K80, pci bus id: 0000:04:00.0, compute capability: 3.7)
[name: "/device:CPU:0"
device_type: "CPU"
memory_limit: 268435456
locality {
}
incarnation: 13411014324454836610
, name: "/device:GPU:0"
device_type: "GPU"
memory_limit: 11953517364
locality {
  bus_id: 1
  links {
  }
}
incarnation: 133570401343557472
physical_device_desc: "device: 0, name: Tesla K80, pci bus id: 0000:04:00.0, compute capability: 3.7"
]
this also confirms you are correctly using the GPU version of tensorflow and have access to one cpu and one Tesla k-80 CTRL+D to exit
Lets try to fit a simple model. Copy the following text into a file called my_test.py using your favorite text editor (for example emacs)
my_test.py# import tensorflow as tf (x_train,y_train),(x_test,y_test)=tf.keras.datasets.mnist.load_data() #Note this will download the mnist dataset to ~/.kears/datasets the first time you run it #Lets create a 2 hidden layer neural network input=tf.keras.layers.Input(shape=(28,28)) network=tf.keras.layers.Flatten()(input) network=tf.keras.layers.Dense(10)(network) network=tf.keras.layers.LeakyReLU()(network) network=tf.keras.layers.Dropout(0.2)(network) network=tf.keras.layers.Dense(10)(network) network=tf.keras.layers.LeakyReLU()(network) output=tf.keras.layers.Dense(10,activation='softmax')(network) my_model=tf.keras.models.Model(input,output) my_model.summary() my_model.compile(loss='sparse_categorical_crossentropy',optimizer='adam',metrics=['acc']) my_model.fit(x_train,y_train,validation_data=(x_test,y_test),epochs=10)
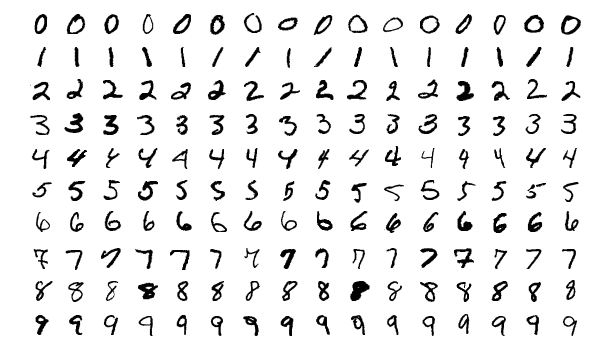
This model is training to identify a hand written number from a 28x28 pixel image. We use two fully connected layers, and dropout (to prevent overfitting).
Example Data: https://en.wikipedia.org/wiki/MNIST_database
Lets run it
$ python3 my_test.py

(60000, 28, 28)
_________________________________________________________________
Layer (type)                 Output Shape              Param #
=================================================================
input_1 (InputLayer)         (None, 28, 28)            0
_________________________________________________________________
flatten_1 (Flatten)          (None, 784)               0
_________________________________________________________________
dense_1 (Dense)              (None, 10)                7850
_________________________________________________________________
leaky_re_lu_1 (LeakyReLU)    (None, 10)                0
_________________________________________________________________
dropout_1 (Dropout)          (None, 10)                0
_________________________________________________________________
dense_2 (Dense)              (None, 10)                110
_________________________________________________________________
leaky_re_lu_2 (LeakyReLU)    (None, 10)                0
_________________________________________________________________
dense_3 (Dense)              (None, 10)                110
=================================================================
Total params: 8,070
Trainable params: 8,070
Non-trainable params: 0
_________________________________________________________________
Train on 60000 samples, validate on 10000 samples
Epoch 1/10
2018-09-19 11:52:13.929548: I tensorflow/core/platform/cpu_feature_guard.cc:140] Your CPU supports instructions that this TensorFlow binary was not compiled to use: AVX2 FMA
2018-09-19 11:52:14.058190: I tensorflow/core/common_runtime/gpu/gpu_device.cc:1344] Found device 0 with properties:
name: Tesla K80 major: 3 minor: 7 memoryClockRate(GHz): 0.8235
pciBusID: 0000:04:00.0
totalMemory: 11.92GiB freeMemory: 11.75GiB
2018-09-19 11:52:14.058229: I tensorflow/core/common_runtime/gpu/gpu_device.cc:1423] Adding visible gpu devices: 0
2018-09-19 11:52:14.335734: I tensorflow/core/common_runtime/gpu/gpu_device.cc:911] Device interconnect StreamExecutor with strength 1 edge matrix:
2018-09-19 11:52:14.335778: I tensorflow/core/common_runtime/gpu/gpu_device.cc:917]      0
2018-09-19 11:52:14.335786: I tensorflow/core/common_runtime/gpu/gpu_device.cc:930] 0:   N
2018-09-19 11:52:14.336087: I tensorflow/core/common_runtime/gpu/gpu_device.cc:1041] Created TensorFlow device (/job:localhost/replica:0/task:0/device:GPU:0 with 11399 MB memory) -> physical GPU (device: 0, name: Tesla K80, pci bus id: 0000:04:00.0, compute capability: 3.7)
60000/60000 [==============================] - 7s 123us/step - loss: 4.1213 - acc: 0.6669 - val_loss: 1.4595 - val_acc: 0.8431
Epoch 2/10
60000/60000 [==============================] - 7s 109us/step - loss: 1.3066 - acc: 0.7841 - val_loss: 0.4579 - val_acc: 0.8820
Epoch 3/10
60000/60000 [==============================] - 7s 109us/step - loss: 0.6586 - acc: 0.8106 - val_loss: 0.3734 - val_acc: 0.8948
Epoch 4/10
60000/60000 [==============================] - 6s 108us/step - loss: 0.5859 - acc: 0.8254 - val_loss: 0.3708 - val_acc: 0.8942
Epoch 5/10
60000/60000 [==============================] - 6s 107us/step - loss: 0.5356 - acc: 0.8412 - val_loss: 0.3513 - val_acc: 0.9021
Epoch 6/10
60000/60000 [==============================] - 6s 107us/step - loss: 0.5148 - acc: 0.8457 - val_loss: 0.3542 - val_acc: 0.9043
Epoch 7/10
60000/60000 [==============================] - 6s 107us/step - loss: 0.5036 - acc: 0.8484 - val_loss: 0.3397 - val_acc: 0.9064
Epoch 8/10
60000/60000 [==============================] - 6s 107us/step - loss: 0.4928 - acc: 0.8533 - val_loss: 0.3207 - val_acc: 0.9140
Epoch 9/10
60000/60000 [==============================] - 6s 107us/step - loss: 0.4837 - acc: 0.8549 - val_loss: 0.3309 - val_acc: 0.9085
Epoch 10/10
60000/60000 [==============================] - 6s 107us/step - loss: 0.4819 - acc: 0.8560 - val_loss: 0.3224 - val_acc: 0.9127s
Congratulations you've trained your first network on Talapas! Let's try one more time in batch mode.
- Use CRTL+D to close your interactive session
Write a new submit script to run the same training code, by putting the following into a file named submit_gpu_test
submit_gpu_test#!/bin/bash #SBATCH --job-name=GPUMnistTest ### Job Name #SBATCH --partition=gpu ### Quality of Service (like a queue in PBS) #SBATCH --time=0-01:00:00 ### Wall clock time limit in Days-HH:MM:SS #SBATCH --nodes=1 ### Node count required for the job #SBATCH --ntasks-per-node=1 ### Nuber of tasks to be launched per Node #SBATCH --gres=gpu:1 ### General REServation of gpu:number of gpus #SBATCH --account=<your account> module load cuda/9.0 module load python3 python3 my_test.py > my_test_output
Submit this job
sbatch submit_gpu_test
That's it wait for your job to finish, and you'll see the training log in ~\my_test_output
Using the Latest Tensorflow with Singularity
If you need the latest version of tensorflow for your code, it is possible to pull a pre-made docker image and run it with singularity.
For example in an interactive GPU session (see above):
Build your image from the online repository - this will create a tf-l.simg file that can be executed with singularities other commands. This will take some time, but only needs to be done once.
$ singularity build tf-l.simg docker://tensorflow/tensorflow:latest-gpu
Try an interactive shell - Note: --nv is required for gpu usage, and -B will just mount a local directory to /tmp in the virtual image.
$ singularity shell -B my_dir:/tmp --nv tf-l.simg

Singularity tf-l.simg:~> python
Python 2.7.12 (default, Dec  4 2017, 14:50:18)
[GCC 5.4.0 20160609] on linux2
Type "help", "copyright", "credits" or "license" for more information.
>>> import tensorflow as tf
>>> tf.__version__
'1.11.0'
>>> import keras
>>> keras.__version__
'2.2.2'
That's it you now have a working tensorflow environment. For more information about running jobs in singularity on Talapas see Singularity.
Related articles